
Blog post
co-construction, construction, and constructivism
okay – been too long getting out a blog post, sometimes 1000 word posts are too daunting and as a result get put off and put off until topics are lost in the flurry of life’s busy activities. This post will focus on work currently in progress and things that tied to that from recent professional development work.
Co-Construction
Last week Anne Davies and Sandra Herbst spent two days on our campus and worked with the majority of high school staff conducting sample lessons, leading conversation and challenging our notions on instructional design and how we evaluate and assess learning. Some of my favorite thoughts from them:
** assessment derives from assess which means “to sit beside”
** assessment has three data legs to stand on for valid triangulation: products (artifacts), observations, conversations
** “we build on success” – an important thing to remember – work on strengths
** “students choosing to engage” – how do we make it possible?
** saying the issue or problem louder or more frequently will not improve the situation
To that end, they led some sessions that showed ways to get to co-construction of assessment criteria and expectations. This week I had my kids do a modified version. We looked a 6 different blog posts from this weekend that were supposed to be a reflective summary of what we had done the past week. In teams of two they read 6 anonymous reflections and noted at least 3 parts they thought were strong and noted why, and looked for elements they thought could be better and noted why.
We then complied this list on the board – this is what they came up with:
We next looked a pre-made rubric for evaluating student reflective blogs. (here: https://www2.uwstout.edu/content/profdev/rubrics/blog_rubric_revised.pdf) They looked at the criteria and identified wording and sections they thought were strong. Not surprisingly (to them or me) the wording was different, but the criteria and descriptors were very much like their own.
We discussed which we would rather use and we decided it was more powerful to use our own language so we will clean this up next class and use it to evaluate our work from here on out.
Construction
One of our projects this semester is to design, prototype and build a water park ride (seriously). To get there I am having them first build a scale model of a catapult that I found on this website: http://www.stormthecastle.com/catapult/mark-thomas-modified-ogre-catapult.htm
This is the instructions I gave them:
Catapult Prototypes:
Our goal today is to build a scale model of the catapult that we see on this page:
http://stormthecastle.com/catapult/mark-thomas-modified-ogre-catapult.htm
we will eventually make the actual model, but in order to see the construction requirements, a scale model is a good way to start.
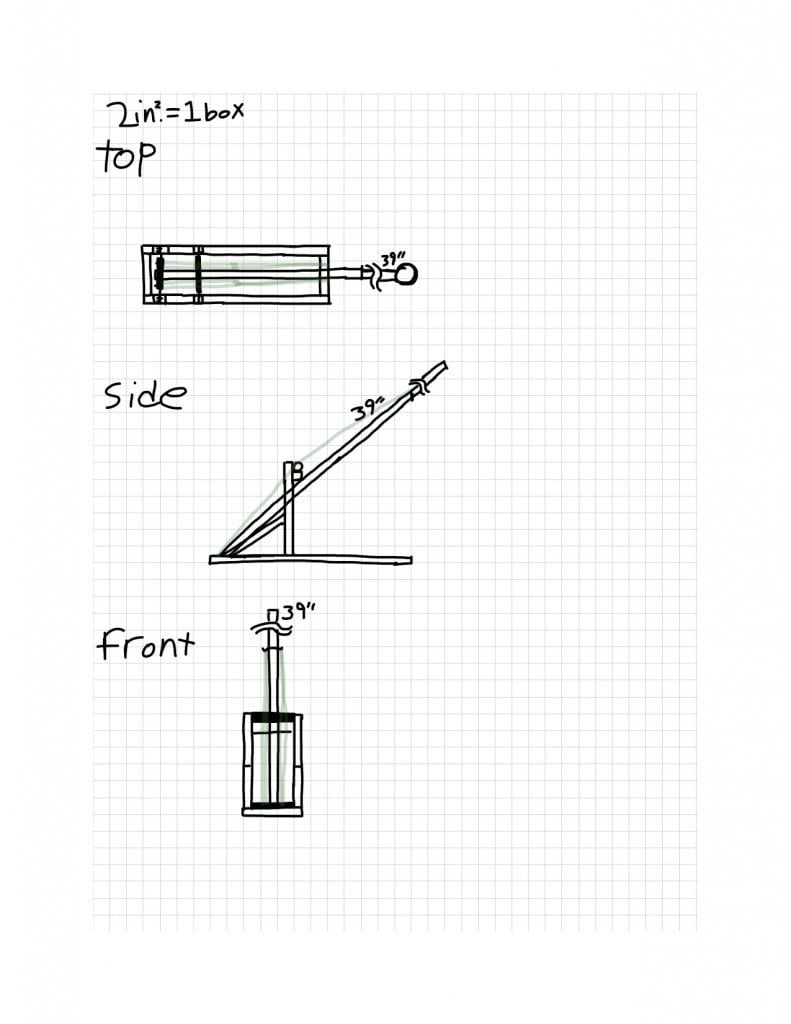
Schematic diagrams
to start, you are to make a three view schematic diagram so that you’re both aware of the materials needed, as well as how they fit together and other design considerations. On one piece of graph paper, accurately and completely create top, side, and front view diagrams making sure to include all important measurements and edges, drawn accurately and with straight lines using a ruler and labeling all parts as necessary.
please look at these presentations about how to make a scale drawing:
http://www.authorstream.com/Presentation/Tirone-38765-Orthographic-Projection-Multi-View-Drawing-History-Revolving-pr-Education-ppt-powerpoint/
http://www.authorstream.com/Presentation/waqqas-314623-orthographic-projection-education-ppt-powerpoint/
Here are a few examples of what a good three view representation should look like:
http://image.thefabricator.com/a/articles/images/2249/precision-large-view-figure5b.gif
http://www.dimcax.com/gdt_web/november-04_files/july-02-1.gif
http://upload.wikimedia.org/wikipedia/commons/thumb/4/45/Mech_draw_1.svg/200px-Mech_draw_1.svg.png
http://graphicalcommunication.skola.edu.mt/wp-content/uploads/2010/09/Engineering-Drawing-1.jpg
http://engineeringtraining.tpub.com/14069/img/14069_162_6.jpg
http://graphicalcommunication.skola.edu.mt/wp-content/uploads/2010/09/Form-4-HYE-2009-010109-Model-11.jpg
Once you have created your schematic orthographic drawings and have them approved, get your materials and build a 1/4 scale model of the catapult.
materials list
four sets of chopsticks
two drinking straws
one metal rod
four paperclips
glue gun
four rubber bands
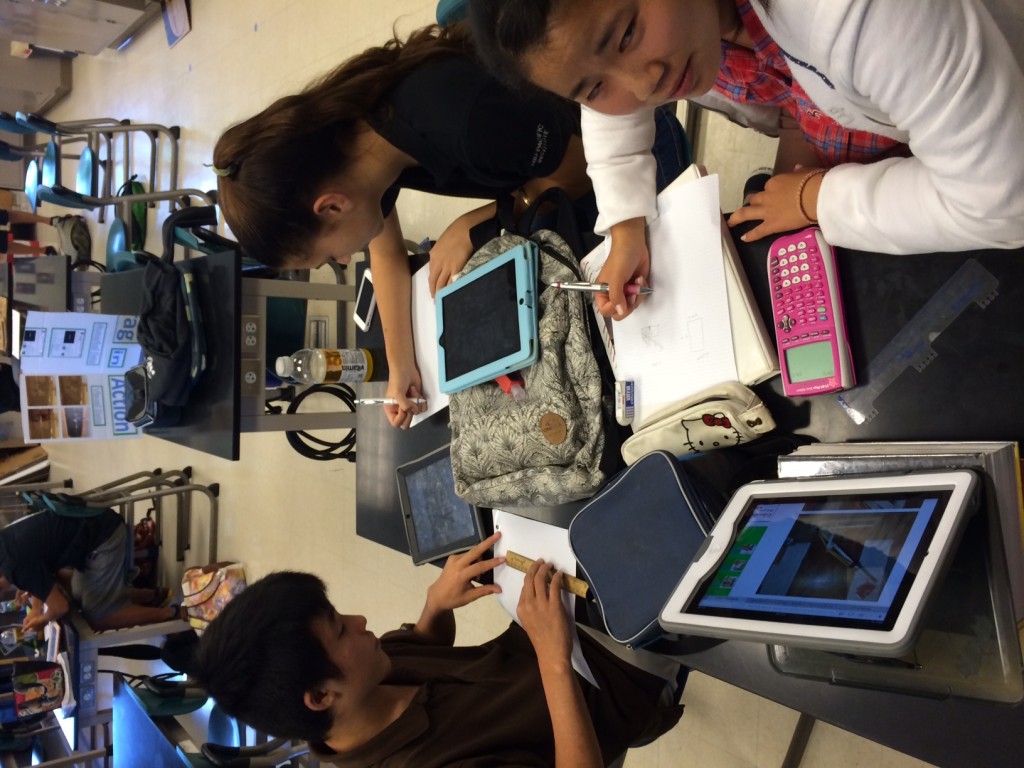
The first step was taking the pictures of the Modified Ogre design and turn it into quality orthographic diagrams on graph paper or digitally on notability. One student asked to use a CAD software package and translate that into orthographic drawings – pretty cool idea.
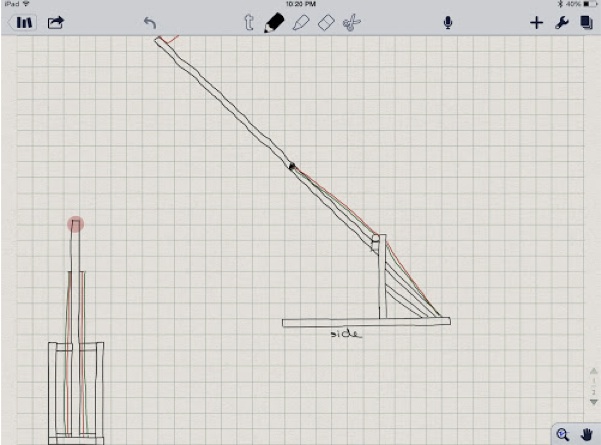
I budgeted 30 minutes to do the drawing **Big Mistake** over an hour in, it became clear that creating quality drawings from the pictures was more challenging than I thought. Some students started to get close:
Once they finish the drawings they will construct the 1/4 scale model, then we will move onto the actual construction in a week’s time. More to come on this adventure. The real goal is three fold:
** re-touch on the design process before we launch into the water park slide
** re-aquaint and add epetise on pwer tools in our mpx maker space so we can use them well
** understad the kinematic equations around projectile motion and the concepts of mementum and energy that a good ccatalpuly challenge will require. That will build on our Phyics knowledge AND our understanding and use of solving quadrtics from Apgebra 2.
Constructivism
Lastly we are reviewing all of Alg 2A (first semester Algebra) by taking a Chapter at a time and working through traditional problems for practice and self-checking against our math standards. We are doing this in a modified “Flipped” approach – I have them review the information (including a few key Khan academy videos) before they come to class, then they work through some practice problems sets during class time with guided help from each other (first) and me (second). The goal is to have LOTS of mathematical conversations as we work towards solving the problems. What is interesting to me is though it more than not a traditional approach (albeit flipped) the students more than not like this approach – the practice – this is some of their comments from their reflective blogs:
I had some trouble on the math because I don’t think we worked on problems like that earlier in the year but I do find it helpful that we are learning basic math like the other classes. I am not very confident in math but I do catch on with a good explanation. Sometimes I need to do a review because I often forget what we did a week after learning it.
I like how we are doing more math now, like Inequalities, patterns, and expressions. I am starting to get the hang of how to do these math problems. I think how we had to do the text book work was good because it is helpful and gets us ready for next year.

and there we are for this week…